
前言
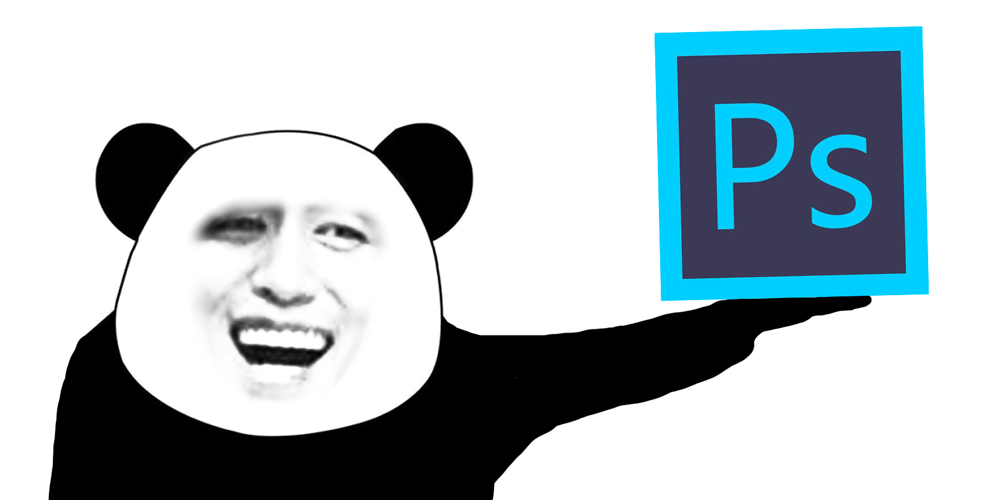
这是你的Photoshop
为了画一条直线,你需要
 →
→  →
→  →
→  →
→ 
才能
你无法精确控制端点的坐标,除非你进行一些无法口算的计算。
你无法绘制函数图像,因为它没有这个功能也无法绘画精确起始点的直线。
你无法生成一些随机模式的图像,因为它没有编程接口。
辣鸡!
这是你的Origin

不好意思拿错了

我在硬盘中翻找出一张尘封已久的大物实验数据图,并截取了一部分
看看这毛刺,这也是21世纪的软件?
这些常用的垃圾软件根本满足不了我们绘图也要追求完美的心!
哪个男孩不想拳打Photoshop,脚踢Origin,写一个超叼的画图程序呢!

理想非常远大,我们需要一步一步做起。
如何输出一张图片文件?
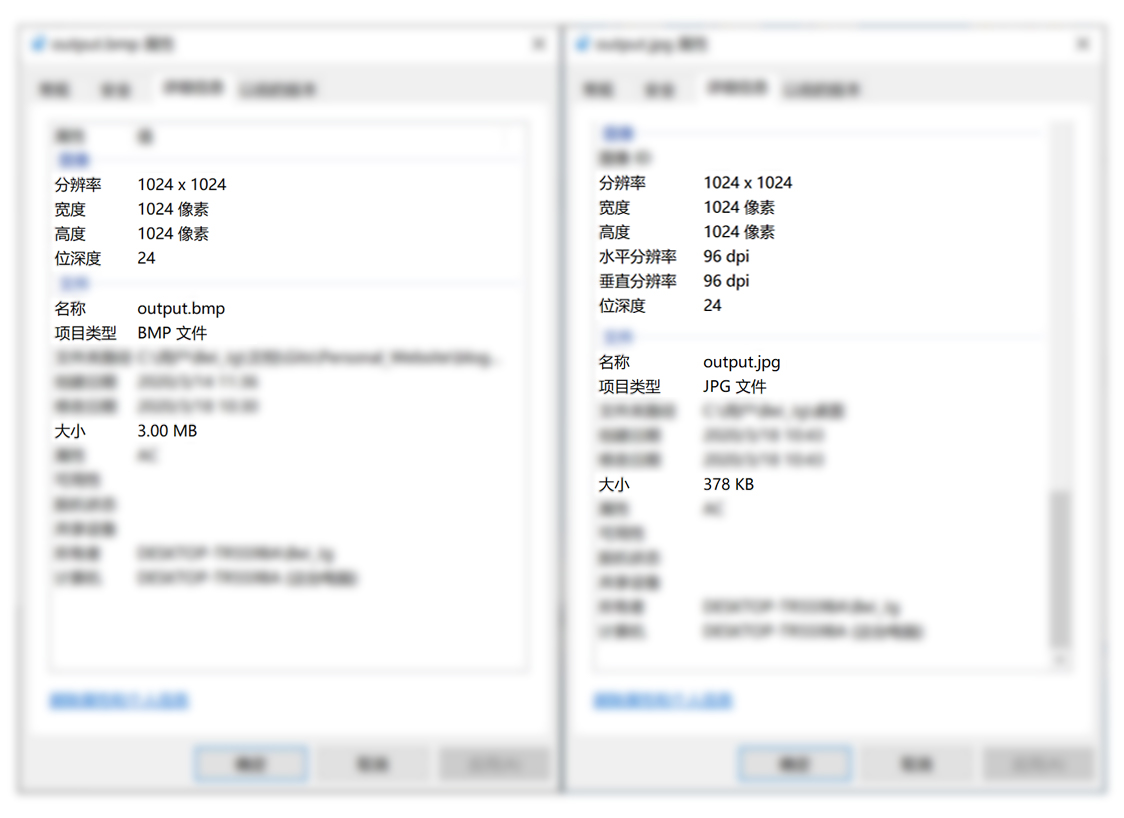
1. BMP格式图片文件
这里我们先采用BMP格式图片的协议,因为它结构朴素,没有花里胡哨的压缩算法,非常易于实现。
BMP是英文Bitmap(位图)的简写,它是Windows操作系统中的标准图像文件格式,能够被多种Windows应用程序所支持……
BMP文件的图像深度可选1bit、4bit、8bit、16bit、24bit及32bit。
BMP文件存储数据时,图像的扫描方式是从左到右、从下到上的顺序。
优点:像素排序与笛卡尔坐标一致。
缺点:体积大。
例如:1024×1024,24位色深 → 3MB。
BMP文件结构:位图文件头、位图信息头、调色板、位图数据。
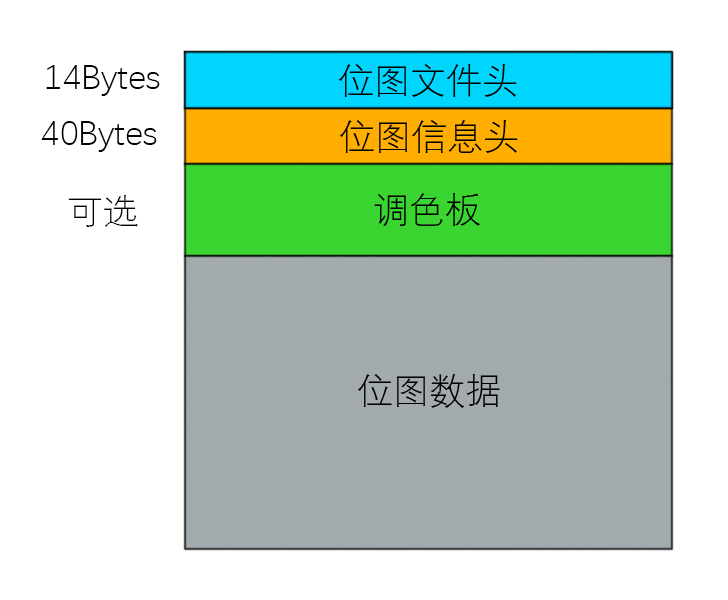
① 位图文件头
定义在 WINGDI.h → BITMAPFILEHEADER
typedef struct tagBITMAPFILEHEADER
{
    WORD    bfType;
    DWORD   bfSize;
    WORD    bfReserved1;
    WORD    bfReserved2;
    DWORD   bfOffBits;
} BITMAPFILEHEADER;

关键字段说明:
bfType→ “BM” (0x4D42)bfSize→ 文件大小bfReserved1,2→ 保留,0bfOffBits→ 数据区起始偏移(54)
② 位图信息头
定义在 WINGDI.h → tagBITMAPINFOHEADER
typedef struct tagBITMAPINFOHEADER
{
    DWORD   biSize;
    LONG    biWidth;
    LONG    biHeight;
    WORD    biPlanes;
    WORD    biBitCount;
    DWORD   biCompression;
    DWORD   biSizeImage;
    LONG    biXPelsPerMeter;
    LONG    biYPelsPerMeter;
    DWORD   biClrUsed;
    DWORD   biClrImportant;
} BITMAPINFOHEADER;
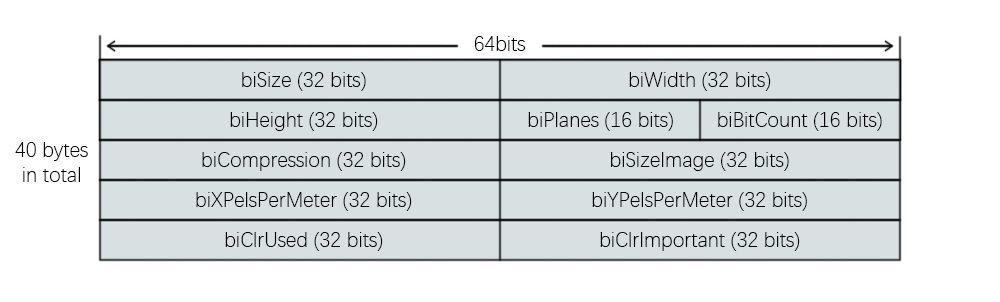
主要字段:
biSize = 40biWidth, biHeight→ 图像尺寸biPlanes = 1biBitCount→ 色深 (1/4/8/16/24/32)biCompression→ 压缩方式 (0=无压缩)biSizeImage→ 图像数据大小(4字节对齐)biXPelsPerMeter, biYPelsPerMeter→ 分辨率biClrUsed, biClrImportant→ 调色板使用情况
⚠️ 注意:行数据必须4字节对齐。
③ 调色板
仅在 1bit、4bit、8bit 色深时存在。
定义在 WINGDI.h → tagRGBQUAD
typedef struct tagRGBQUAD
{
    BYTE    rgbBlue;
    BYTE    rgbGreen;
    BYTE    rgbRed;
    BYTE    rgbReserved;
} RGBQUAD;
每种颜色占 4 字节,按 BGR 顺序。
④ 位图数据
像素排列:从左到右,从下到上。 每行必须补齐到4字节。
示例:3×3 24bit 图片,每行9字节 → 补齐到12字节。
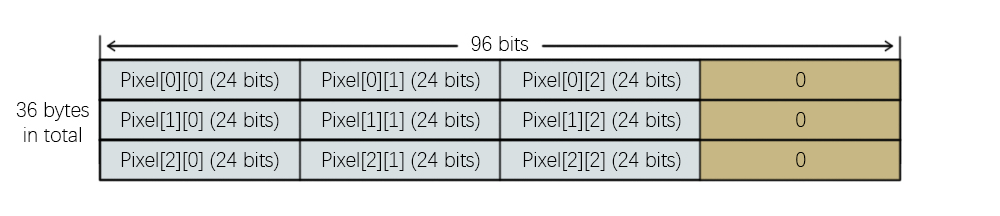
计算公式:
lineSize = (biBitCount * biWidth + 31) / 32 * 4;
biSizeImage = lineSize * biHeight;
bfSize = biSizeImage + bfOffBits;
2. 编程实现
Color 类
class Color
{
    public:
        uint8_t red;
        uint8_t green;
        uint8_t blue;
        float alpha;

        Color() : red(0), green(0), blue(0), alpha(0) {}

        Color& rgb(uint8_t red, uint8_t green, uint8_t blue)
        {
            this->red = red;
            this->green = green;
            this->blue = blue;
            this->alpha = 1;
            return *this;
        }

        Color& rgba(uint8_t red, uint8_t green, uint8_t blue, float alpha)
        {
            this->red = red;
            this->green = green;
            this->blue = blue;
            this->alpha = alpha;
            return *this;
        }
};
Image 类
class Image
{
    private:
        uint8_t* data;
        uint32_t width;
        uint32_t height;

    public:
        Image(uint32_t width, uint32_t height)
        {
            this->width = width;
            this->height = height;
            data = new uint8_t[3*width*height];
            memset(data, 255, 3*width*height); // 白色
        }

        ~Image() { delete[] data; }

        void setPixel(uint32_t x, uint32_t y, Color color)
        {
            *(data + 3 * (y * width + x)) = color.blue;
            *(data + 3 * (y * width + x) + 1) = color.green;
            *(data + 3 * (y * width + x) + 2) = color.red;
        }
保存 BMP
void saveBMP(const char* filename)
{
uint32_t size = (3 * width + 3) / 4 * 4 * height + 54;
uint16_t head[54] = {
0x4D42, (uint16_t)size,(uint16_t)(size>>16),
0x0000,0x0000,
0x0036,0x0000,
0x0028,0x0000,
(uint16_t)width,(uint16_t)(width>>16),
(uint16_t)height,(uint16_t)(height>>16),
0x0001,
0x0018,
0x0000,0x0000,
0x0000,0x0000,
0x0000,0x0000,
0x0000,0x0000,
0x0000,0x0000
};
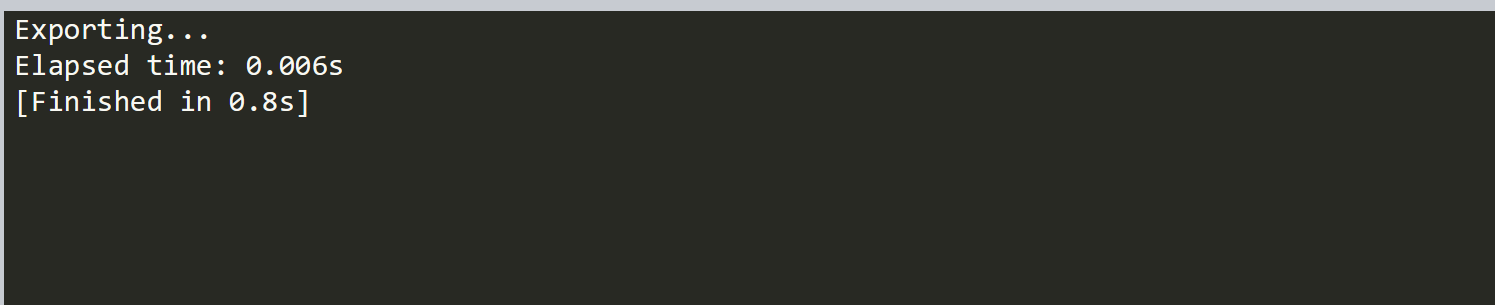
cout << "Exporting...\n";
fstream file(filename, ios::out | ios::binary);
if (!file) { cout << "Error: File open failed.\n"; return; }
file.write((char *)head,54);
uint8_t fillBytes[3] = {0};
int fillNum = (4 - (3 * width) % 4) % 4;
for (int i = 0; i < height; i++)
{
file.write((char *)(data + 3 * width * i), width*3);
file.write((char *)fillBytes, fillNum);
}
file.close();
}
}; // end of Class Image
测试代码
int main()
{
    clock_t startTime = clock();
    Image image(512, 128);
    Color color;
    for (int x = 0; x < 512; x++)
        for (int y = 0; y < 128; y++)
        {
            image.setPixel(x, y, color.rgb(x / 4 + y, 255 - x / 4 - y, 127 + x / 4 - y));
        }
    image.saveBMP("output.bmp");
    clock_t endTime = clock();
    cout<<"Elapsed time: "<<(double)(endTime - startTime) / CLOCKS_PER_SEC<<"s\n";
    return 0;
}
输出效果:
打开 output.bmp
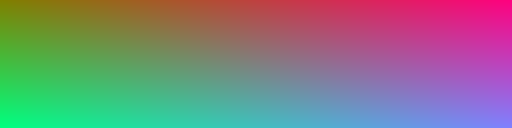
NICE!
代码
本节代码请查看: 🔗 Github: JeffreyXiang/DrawWithCpp
预告
下一篇博文我们将来聊聊在画布上画出一条直线的多种算法。